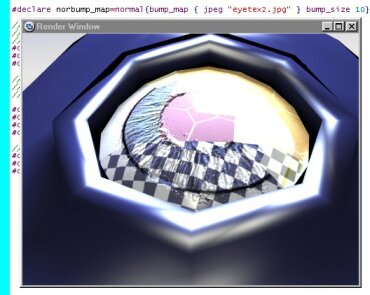
| Bump_Map:
index:Page précedente |
|
|
Ajouter
un Bump_map/Adding a Bump_map
|
|
Avec
l'interface de construction de matériaux
(attribution
basée materiau )
|
With
the Material Interface Designer
(material
based attribution) |
| Pour réussir l'ajout,
il faut garder plusieurs choses à l'esprit:
-- > 1/ l'interface
fonctionne en connectant des <<objets>> les uns avec les autres.
-- > 2/ il est obligatoire
de créer un objet image, "Oimage",
à partir des images stockées dans Blender.
--> 3/ l'objet Oimage
est utilisé dans la construction d'un objet normal.
--> 4/ l'objet normaldoit
être associé à un matériau en particulier.
A/ Commencer
par vérifier que l'objet à bien au moins une texture uvmappées,
ou plusieurs. |
To get a succeeded bump_map
addition keep in mind that:
-- > 1/ the interface
works by connecting <<objects>>, ones to the others.
-- > 2/ you have to
create an image object "Oimage", from the
pictures stored in Blender.
--> 3/ This Oimage
object is used to make a new normal object.
--> 4/ The normal
object have to be connected to a material .
A/ First,
check that the mesh you are working on, has at least one uvmapped
texture (or more).. |

|
| B/ Cliquez
sur le bouton Matérial dans le pied-de-page de la fenêtre
principale de povanim pour afficher la fenêtre Extra Material
and textures |
B/
Click
on the Material button at the bottom of the Main Povanim
window to display the Extra Material and textures window. |

|
| C/ Cliquez
le bouton Material
Design interface. |
C/ Click
the Material
Design interface button |

|
| D/ Sur
le coté gauche de la fenêtre choisissez
Pimages. |
D/
On
the left side of the window select Pimages. |

|
| E/ Sélectionnez
le type d'Export, donc : bump_map |
E/ Select
the Export type, so : bump_map |

|
| F/ Sélectionnez
le type de l'image: |
F/ Select
the image type with imgtype menu. |

|
| G/ Sélectionner
le nom de l'image: |
G/ Select
the image name in the pimagelist: |

|
| H/
Facultatif:
il
est possible de régler la taille du bump_map avec le curseur
bump_size et choisir de donner un peu de lissé
à l'image en lui associant une valeur interpolate. |
H/
Optionaly:
you
can set the size of the bump_map with the bump_size slider
; you can also choose to give a bit smooth to the image using an
interpolate value. |

|
I/ Ne
pas oublier d'appuyer
sur le bouton
Add to Oimglist pour
enregistrer ce nouvel objet. |
I/
Do
not forget to push the Add
to Oimglist
button to record this new object. |

|
| J/ Facultatif:
vérifiez
que le nom de l'objet "image" est bien dans la liste en ouvrant le menu
Oimagelist. |
J/Optional
: check that the name of the "image" object really
is in the list by opening the menu Oimagelist. |

|
K/ Passez
dans la fenêtre normal.
3
opérations à effectuer:
-- choisr le type.
-- choisir l'Oimage
-- ajouter le nouvel objet normal à la normallist |
K/
Go
to the normal
window.
3 operations
have to be executed:
-- choose the type.
-- choose the Oimage
-- add the new normal object to the normallist |

|
| L/ Activez
le normatype et choisissez bump_map |
L/ Push
the [A] button at the left of normatype and select
bump_map
in
the menu. |

|
| M/ Les
options du type sélectionné deviennent blanches. |
M/
The
selected type options become white.. |

|
| N/ Choisissez
le nom de l'objet Oimage dand la liste Oimagelist: |
N/
Select
the Oimage name in the Oimagelist list. |

|
| O/
Appuyez sur Add to normal list
pour enregistrer l'objet normal . |
O/
Push Add to normal list to
record the normal object . |

|
| P/ Facultatif:
vérifiez
le bon enregistrement en contrôlant que le nom est correctement inscrit
sur la ligne Name |
P/
Optional:
check
the record by contkolling that the name is correctly written on the
Name
line. |

|
| Q/ Ne
pas oublier de sélectionner
le nom de l'objet normal dans le menu normallist
car c'est le nom qui figure dans ce menu qui sera connectée au matériau. |
Q/
Do
not forget to select the object
name normal in the normallist
menu because it is this name that will be connected to the material.. |

|
| R/ Quelques
lignes au-dessus, dans le menu Materials List,
à coté de "Select your material", sélectionnez
le nom du matériau auquel sera attaché le bump_map. |
R/
Few
lines above, in the Materials List menu, beside
"Select
your material", select the name of the material
the bump_map will be attached to. |


|
| S/ Appuyez
sur Add. Voilà c'est terminé. Si l'opération
a réussie, un ['N'] apparaît à
coté du nom de matérial. |
S/
Push
the Add button. That's all folks!! (really long, isn' it?) now
it is finished. If the operation is successful done, a ['N']
appears in the menu just beside the material name. |

|
| T/ Exportez
le fichier blender vers povray. |

|
| U/ Faite
un rendu. |
|

|
| ... |
|

|
|
|
